Category: AWS – July 2023

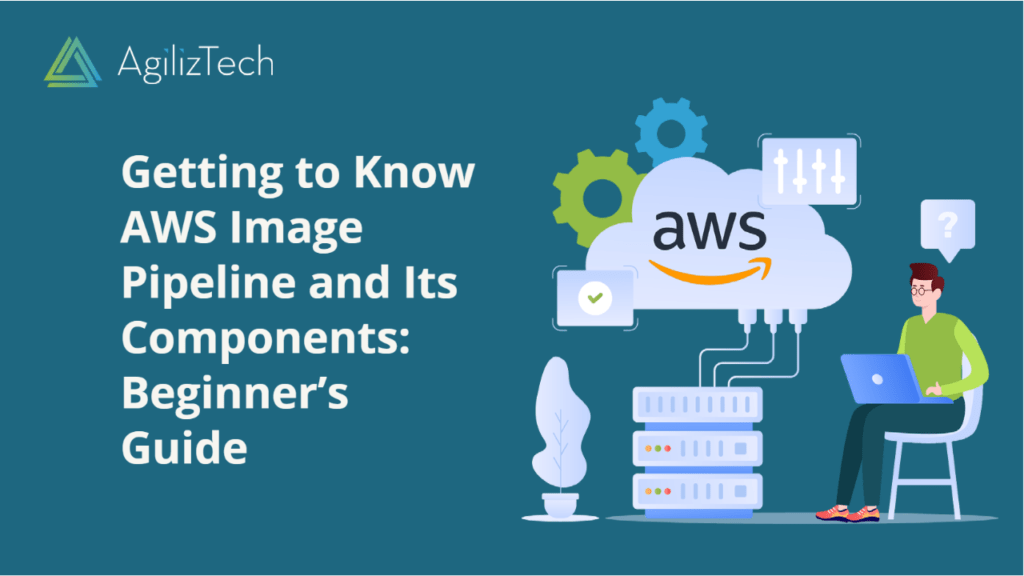
Getting to Know AWS Image Pipeline and Its Components

AWS Image Pipeline: Beginner’s Guide

If you want to automate the creation and management of Amazon Machine Images (AMIs), you can use the AWS Image Builder service. This service allows you to create image pipelines that define the source image, the configuration, and the distribution settings for your AMIs. In this blog post, we will show you how to create AWS image pipeline using the AWS Management Console.

AWS Image Pipeline: Overview

AWS image pipeline consists of four main components:

  • An image recipe: This defines the source image, the components, and the tests that are applied to your image. Components are scripts or documents that specify the actions to perform on your image, such as installing software, configuring settings, or running commands. Tests are scripts or documents that verify the functionality or security of your image.
  • An infrastructure configuration: This defines the AWS resources that are used to build and test your image, such as the instance type, the subnet, the security group, and the IAM role.
  • A distribution configuration: This defines where and how to distribute your image, such as the regions, the accounts, and the output formats (AMI, Docker, etc.).
  • An image pipeline: This links the image recipe, the infrastructure configuration, and the distribution configuration together. It also defines the schedule and the status of your image building process.

Procedures

To create an image pipeline in AWS, follow these steps:

  1. Open the AWS Management Console and access the Image Builder service.
  2. In the left navigation pane, choose Image pipelines and then choose Create image pipeline.
  3. In the Create image pipeline page, enter your image pipeline’s name and optional description.
  4. Under Image recipe, choose an existing image recipe or create a new one. To create a new one, choose Create new and follow the instructions on the screen. You will need to specify a source image (such as an Amazon Linux 2 AMI), a version number, a parent image recipe (optional), components (such as AWS-provided components or custom components), and tests (such as AWS-provided tests or custom tests).
  5. Under Infrastructure configuration, choose an existing infrastructure configuration or create a new one. To create a new one, choose Create new and then follow the instructions on the screen. You will need to specify a name, an instance type, a subnet, a security group, and an IAM role for your image builder.
  6. Under Distribution settings, choose an existing distribution configuration or create a new one. To create a new one, choose Create new and then follow the instructions on the screen. You will need to specify a name, regions, accounts, and output formats for your image distribution.
  7. Under the Image pipeline settings, choose a schedule for your image pipeline. You can choose to run it manually or automatically on a cron expression. You can also enable or disable enhanced image metadata and change notifications for your image pipeline.
  8. Choose Create to create your image pipeline.

AWS Image Pipeline: Conclusion

In this blog post, we have shown you how to create an image pipeline in AWS using the Image Builder service. This service allows you to automate the creation and management of AMIs with customized configurations and tests. You can also distribute your AMIs across regions and accounts with ease. To learn more about the Image Builder service, you can visit the official documentation.

Take the Next Step: Embrace the Power of Cloud Services

Ready to take your organization to the next level with cloud services? Our team of experts can help you navigate the cloud landscape and find the solutions that best meet your needs. Contact us today to learn more and schedule a consultation.

Optimizing Resource Allocation: Cross-Account Service Quotas in Amazon CloudWatch

Cross-Account Service Quotas in Amazon CloudWatch

Amazon CloudWatch enhances monitoring with Cross-Account Service Quotas.

Overview

In this blog post, we will discuss what Cross-Account Service Quotas are and how they can help you monitor and manage your AWS resources across multiple accounts. Cross-Account Service Quotas is a feature of Amazon CloudWatch that allows you to view and modify the service quotas of your AWS services for all the accounts in your organization from a single dashboard. This can help you avoid hitting service limits, optimize your resource usage, and simplify your quota management workflow. Discover various use cases:

  • Check usage of specific services like EC2 instances, Lambda functions, or S3 buckets.
  • Adjust quotas for services across accounts, no need to log in separately.
  • Automate quota management with CloudFormation templates or AWS CLI.
  • Set up alarms or dashboards to monitor quota usage and receive notifications.

Cross-Account Service Quotas: Usage

Leverage this feature to:

  • View quotas and usage for all accounts or specific organizational units.
  • Request quota increases for multiple accounts from the master account.
  • Delegate quota management to trusted member accounts.
  • Monitor quota usage through CloudWatch Alarms.

Prerequisites

To use this feature, you need to:

  • Enable AWS Organizations, create an organization with two or more accounts.
  • Enable trusted access between CloudWatch and Organizations.
  • Grant permissions to master and delegated member accounts.
  • Access Service Quotas via console or API.

Cross-Account Service Quotas: Conclusion

Simplify quota management for organizations with multiple AWS accounts. Avoid service disruptions and optimize resource utilization. To enable this feature, you need to have an AWS Organizations account and enable trusted access between CloudWatch and Organizations. Then, you can use the CloudWatch console or API to view and modify the quotas of your services for each account in your organization. You can also set up alarms and notifications to alert you when a quota is approaching or exceeding its limit.

Take the Next Step: Embrace the Power of Cloud Services

Ready to take your organization to the next level with cloud services? Our team of experts can help you navigate the cloud landscape and find the solutions that best meet your needs. Contact us today to learn more and schedule a consultation.

Level Up Your Containerization: AWS Karpenter Adds Windows Container Compatibility

AWS Karpenter Supports Windows Containers: What’s New

Windows Container Support Arrives in AWS Karpenter: What You Need to Know

If you run Windows containers on Amazon EKS, you might find the latest update from AWS intriguing: Karpenter now supports Windows containers. AWS has introduced this update, enabling Windows container compatibility in Karpenter, an open-source project that delivers a high-performance Kubernetes cluster autoscaler. In this blog post, we will explore Karpenter, its functioning, and the benefits it brings to Windows container users.

What is AWS Karpenter?

Karpenter is a dynamic Kubernetes cluster autoscaler that adjusts your cluster’s compute capacity based on your application requirements. Unlike the traditional Kubernetes Cluster Autoscaler, which relies on predefined instance types and Amazon EC2 Auto Scaling groups, Karpenter can launch any EC2 instance type that matches the resource requirements of your pods. By choosing the right-sized instances, Karpenter optimizes your cluster for cost, performance, and availability.

Karpenter also extends support for node expiration, node upgrades, and spot instances. You can configure Karpenter to automatically terminate nodes after a specific period of inactivity or when they become idle. Additionally, you can enable Karpenter to upgrade your nodes to the latest Amazon EKS Optimized Windows AMI, enhancing security and performance. Karpenter offers a feature to initiate spot instances, enabling you to save up to 90% on your computing expenses.

As an open-source project, Karpenter operates under the Apache License 2.0. It is designed to function seamlessly with any Kubernetes cluster, whether in on-premises environments or major cloud providers. You can actively contribute to the project by joining the community on Slack or participating in its development on GitHub.

How does AWS Karpenter work?

Karpenter operates by observing the aggregate resource requests of unscheduled pods in your cluster and launching new nodes that best match their scale, scheduling, and resource requirements. It continuously monitors events within the Kubernetes cluster and interacts with the underlying cloud provider’s compute service, such as Amazon EC2, to execute commands.

To utilize Karpenter, you need to install it in your cluster using Helm and grant it permission to provision compute resources on your cloud provider. Additionally, you should create a provisioner object that defines the parameters for node provisioning, including instance types, labels, taints, expiration time, and more. You have the flexibility to create multiple provisioners for different types of workloads or node groups.

Once a provisioner is in place, Karpenter actively monitors the pods in your cluster and launches new nodes whenever the need arises. For example, if a pod requires 4 vCPUs and 16 GB of memory, but no node in your cluster can accommodate it, Karpenter will launch a new node with those specifications or higher. Similarly, if a pod has a node affinity or node selector based on a specific label or instance type, Karpenter will launch a new node that satisfies the criteria.

Karpenter automatically terminates nodes when they are no longer required or when they reach their expiration time. For instance, if a node remains inactive without any running pods for more than 10 minutes, Karpenter will terminate it to optimize costs. Similarly, if a node was launched with an expiration time of 1 hour, Karpenter will terminate it after 1 hour, irrespective of its utilization.

What are the benefits of using AWS Karpenter for Windows containers?

By leveraging Karpenter for Windows containers, you can reap several advantages:

  • Cost Optimization: Karpenter ensures optimal infrastructure utilization by launching instances specific to your workload requirements and terminating them when not in use. You can also take advantage of spot instances to significantly reduce compute costs.
  • Performance Optimization: Karpenter enhances application performance by launching instances optimized for your workload’s resource demands. You can assign different instance types to various workloads or node groups, thereby achieving better performance outcomes.
  • Availability Optimization: Karpenter improves application availability by scaling instances in response to changing application loads. Utilizing multiple availability zones or regions ensures fault tolerance and resilience.
  • Operational Simplicity: Karpenter simplifies cluster management by automating node provisioning and termination processes. You no longer need to manually adjust the compute capacity of your cluster or create multiple EC2 Auto Scaling groups for distinct workloads or node groups.

Conclusion

Karpenter stands as a robust tool for Kubernetes cluster autoscaling, now equipped to support Windows containers. By leveraging Karpenter, you can optimize your cluster’s cost, performance, and availability, while simultaneously simplifying cluster management. To explore further details about Karpenter, visit the official website or the GitHub repository. For insights on running Windows containers on Amazon EKS, refer to the EKS best practices guide and Amazon EKS Optimized Windows AMI documentation.

Take the Next Step: Embrace the Power of Cloud Services

Ready to take your organization to the next level with cloud services? Our team of experts can help you navigate the cloud landscape and find the solutions that best meet your needs. Contact us today to learn more and schedule a consultation.

Amazon DynamoDB Local

Amazon DynamoDB Local v2.0: What’s New

Learn About Amazon DynamoDB local version 2.0

Amazon DynamoDB is a NoSQL database service that is fully managed and guarantees speedy and consistent performance while also being seamlessly scalable. It allows you to store and query any data without worrying about servers, provisioning, or maintenance. But what if you want to develop and test your applications locally without accessing the DynamoDB web service? That’s where Amazon DynamoDB local comes in handy.

What is Amazon DynamoDB local?

Amazon DynamoDB local is a downloadable version of Amazon DynamoDB that you can run on your computer. It simulates the DynamoDB web service so that you can use it with your existing DynamoDB API calls.

It is ideal for development and testing, as it helps you save on throughput, data storage, and data transfer fees. In addition, you don’t need an internet connection while you work on your application. You can use it with any supported SDKs, such as Java, Python, Node.js, Ruby, .NET, PHP, and Go. You can also use it with the AWS CLI or the AWS Toolkit for Visual Studio.

What’s New in Amazon DynamoDB Local version 2.0?

Amazon DynamoDB local version 2.0 was released on July 5, 2023. It has some important changes and improvements that you should know about.

Migration to jakarta.* namespace

The most significant change is the migration to use the jakarta.* namespace instead of the javax.* namespace. This means that Java developers can now use Amazon DynamoDB local with Spring Boot 3 and frameworks such as Spring Framework 6 and Micronaut Framework 4 to build modernized, simplified, and lightweight cloud-native applications.

The jakarta.* namespace is part of the Jakarta EE project, which is the successor of Java EE. Jakarta EE aims to provide a platform for developing enterprise applications using Java technologies.

Suppose you are using Java SDKs or tools that rely on the javax.* namespace, you will need to update them to use the jakarta.* namespace before using Amazon DynamoDB local version 2.0. For more information, see Migrating from javax.* to jakarta.*.

Updated Access Key ID convention

Another change is the updated convention for the Access Key ID when using Amazon DynamoDB local. The new convention specifies that the AWS_ACCESS_KEY_ID can only contain letters (A–Z, a–z) and numbers (0–9).

This change was made to align with the Access Key ID convention for the DynamoDB web service, which also only allows letters and numbers. This helps avoid confusion and errors when switching between Amazon DynamoDB local and the DynamoDB web service.

If you use an Access Key ID containing other characters, such as dashes (-) or underscores (_), you must change it before using version 2.0. For more information, see Troubleshooting “The Access Key ID or Security Token is Invalid” Error After Upgrading DynamoDB Local to Version 2.0 or Greater.

Bug fixes and performance improvements

It also includes several bug fixes and performance improvements that enhance the stability and usability.

For example, one of the bug fixes addresses an issue where version 1.19.0 had an empty jar file in its repository, causing errors when downloading or running it. This issue has been resolved in version 2.0.

Getting Started with Amazon DynamoDB local version 2.0

  • Getting started is easy and free. You can download it from Deploying DynamoDB locally on your computer and follow the instructions to install and run it on your preferred operating system (macOS, Linux, or Windows).
  • You can also use as an Apache Maven dependency or as a Docker image if you prefer those options.
  • Once you have Amazon DynamoDB local running on your computer, you can use any of the supported SDKs, tools, or frameworks to develop and test your applications locally.

Conclusion

Amazon DynamoDB local version 2.0 is a great way to develop and test your applications locally without accessing the DynamoDB web service. It has some important changes and improvements that make it compatible with the latest Java technologies and conventions. Suppose you are a Java developer who wants to use it with Spring Boot 3 or other frameworks that use the jakarta.* namespace, you should upgrade to version 2.0 as soon as possible.

If you are using other SDKs or tools that rely on the javax.* namespace or an Access Key ID containing other characters, you will need to update them before using. It is free to download and use, and it works with your existing DynamoDB API calls. You can start with it today by downloading it from Deploying DynamoDB locally on your computer.

Take the Next Step: Embrace the Power of Cloud Services

Ready to take your organization to the next level with cloud services? Our team of experts can help you navigate the cloud landscape and find the solutions that best meet your needs. Contact us today to learn more and schedule a consultation.

Close Bitnami banner
Bitnami