Creating Target Group: Step-by-step Guide
Creating Target Group in AWS Console
Overview
In AWS, a target group serves the purpose of routing requests toward one or more registered targets. You can specify a target group for its default action upon creating a listener. The traffic is then directed to the target group specified in the listener rule. Creating multiple target groups tailored to different types of requests is possible. For instance, you can create a target group specifically for general requests, and create separate target groups to handle requests directed towards the microservices within your application.
To create Target Group in AWS Console
- Sign in to the AWS account.
- In the Find Services box, type EC2 and choose EC2 from the results.
- In the right pane, under LOAD BALANCING, choose Target Groups.
The Target groups pane appears.
- Choose Create target group.
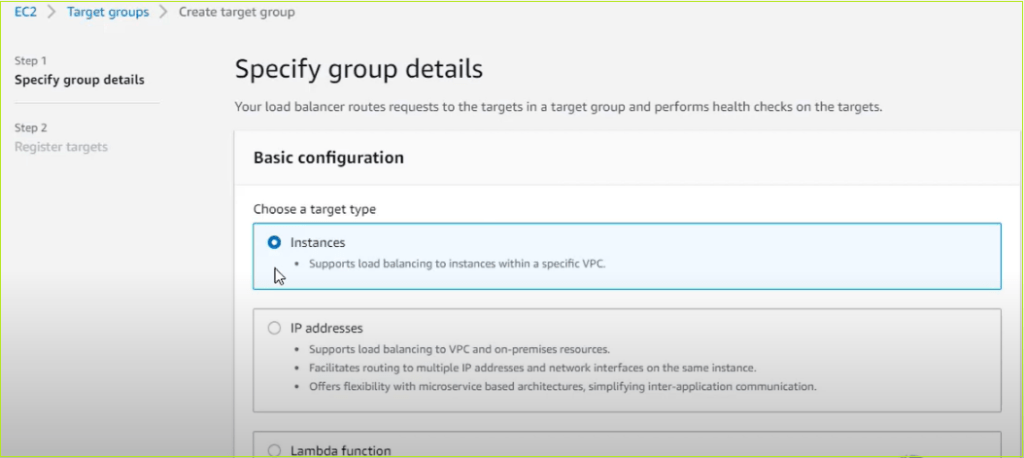
The Create target group pane appears.

- Under Basic configuration, do the following:
- For Choose a target type, click
- In the Target group name box, enter a name for the target group.
- For Protocol list, choose the required protocol.
- In the Port list, change the default value as required.
- For IP address type, click IPv4 or IPv6.
- In the VPC list, choose the virtual private cloud (VPC) with the targets to register.
- Under Health checks, modify the default settings as needed.
- Under Tags – optional, expand Tags, choose Add a tag, and type a tag key and a tag value.
- Choose Next.
The Register targets pane appears.
- In the Register targets pane, choose the instances, enter the ports, and choose Include as pending below.
- Choose Create target group.
The newly created Target group appears in the Target groups pane.

