How to Create an Azure File Share in the Azure Portal
Creating an Azure File Share in the Azure Portal
Discover the simple steps to easily mount Azure file shares on Windows, Linux, and macOS like a pro. This article will show you how to create an SMB Azure file share using the Azure portal. The instructions are easy to follow and will help you complete the task easily.

To create a new Azure file share
- Sign in to the Azure Portal.
- In the Search box, search for Storage account.
- Choose the storage account that you created.
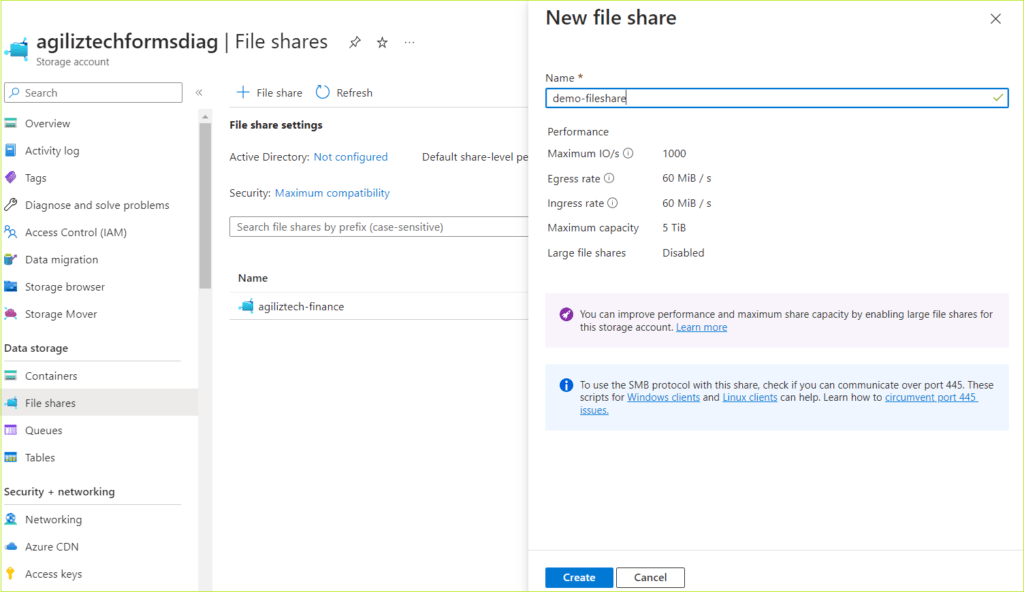
- In the left pane, under Data storage, click File Shares. The File shares pane appears.
- Click + File share. The New file share pane appears.
- In the Name box, type a name for the file share and click Create.
You have successfully created a new file share and it appears in the File Shares pane.


