Creating Azure Active Directory: Step-by-step Guide
Creating Azure Active Directory
This section provides step-by-step instructions for creating Azure Active Directory.
Azure Active Directory (Azure AD) is a vital cloud-based service for managing identity and access. Through Azure AD, your employees gain convenient access to external resources like Microsoft 365, the Azure portal, and an extensive array of SaaS applications. Additionally, Azure Active Directory facilitates access to internal resources, including corporate intranet applications and cloud apps developed specifically for your organization’s needs.
To create an Azure Active Directory
- Sign in to the Azure Portal.
- In the Search box, search for Azure Active Directory and select Azure Active Directory from the results. The Default Directory pane appears.
- On the top menu, select +Create a tenant. The Create tenant pane appears.

Basics
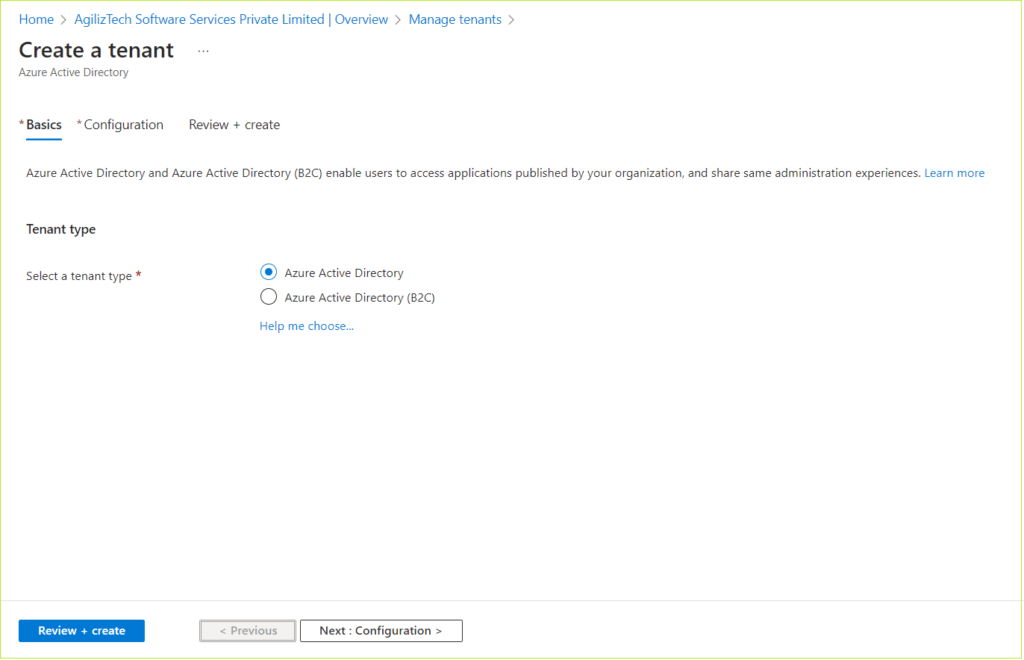
You can select the tenant type Azure Active Directory or Azure Active Directory (B2C).
Under Tenant type, for Select a tenant type, choose the Azure Active Directory option.
Configuration
You can use the Configuration pane to add an organization name, domain name and choose country or region.
- Under Directory details, do the following.
- In the Organization name list, type your organization name.
- In the Initial domain name list, type an initial domain name.
- In the Location list, choose your location.
- Choose Next : Review + create >.
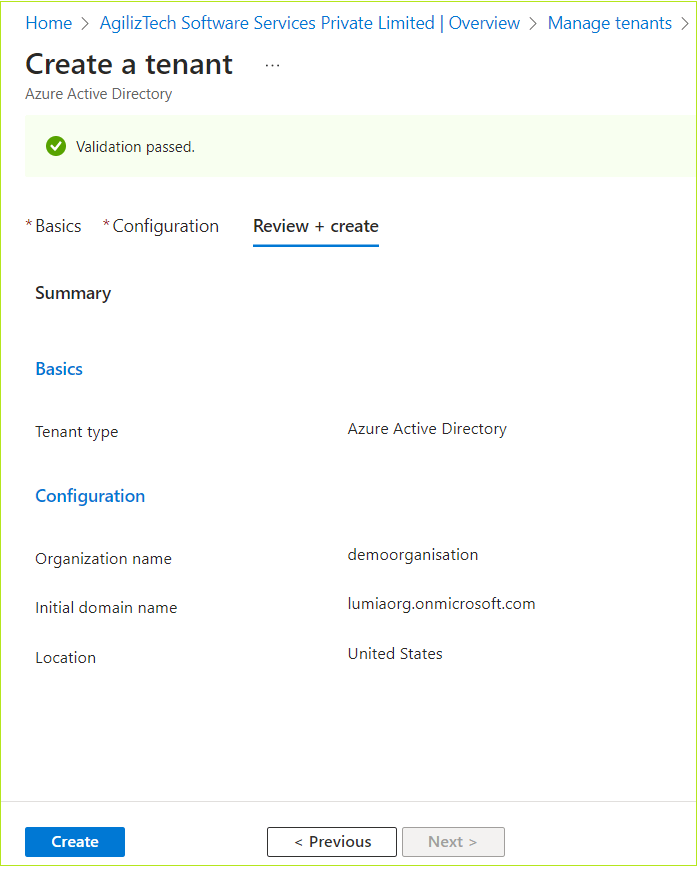
The Review + create pane appears.
Review + create
Once the validation is passed, click Create.

The newly created Tenant appears in the Switch tenant pane.
