How to Create Azure Blob Storage

Azure Blob Storage: Quickstart Guide
This article provides step-by-step instructions on how to create Azure Blob storage in the Azure portal. Azure Blob Storage, a reliable and secure cloud-based service offered by Microsoft, is a superior solution for storing a wide variety of objects. With its advanced capabilities, it can effectively manage vast amounts of unstructured data, including binary and text data. Users can confidently store and easily manage their data using Azure Blob Storage without having to stress about the complexities of data management.
To create Azure blob Storage
- Sign in to the Azure Portal.
- In the Search box, search for Storage account.
- Choose the storage account that you created.
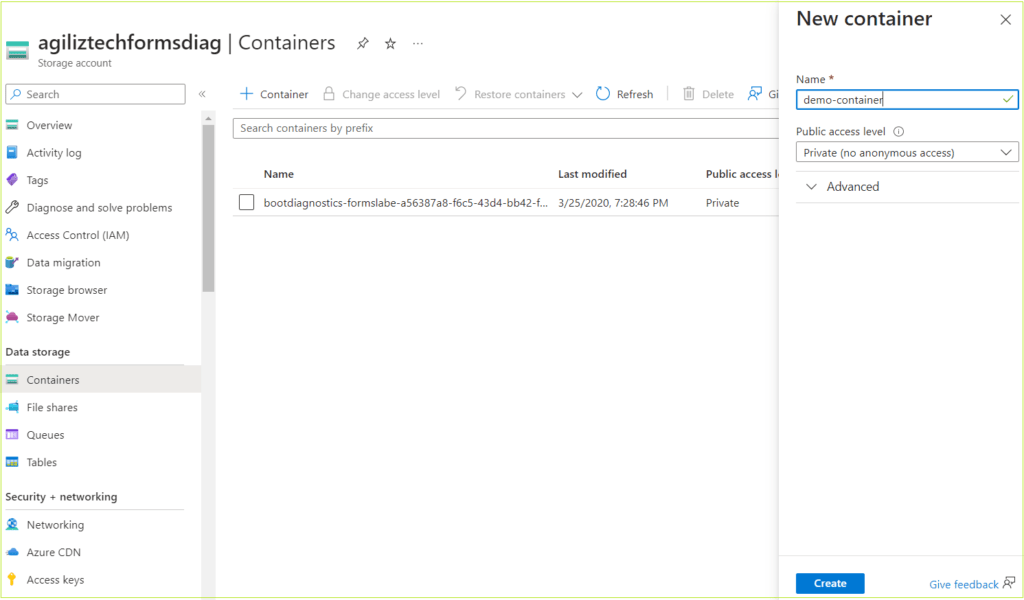
- In the left pane, under Data storage, click containers. The Containers pane appears.
- Click + Container. The New container blade appears.
- In the Name box, type a name for the container.
- In the Public access level list box, choose Private (no anonymous access) and then click Create.
The container you created appears in the list of containers.