Learn to Create a Network Security Group
Create Network Security Group (NSG) and Associate a Subnet
Creating Network Security Group
Azure Network Security Group (NSG) is a fundamental component of Azure’s network security offering, providing a flexible and scalable way to control traffic flow to and from Azure resources. It acts as a virtual firewall that filters network traffic at the subnet or virtual machine level based on user-defined rules.

To create a network security group in the Azure portal
- Sign in to the Azure Portal.
- In the Search box, search for Network Security Group. The Network security group pane appears.
- Click + Create. The Create network security group pane appears.
- In the Basics pane, under Project details, do the following:
- In the Subscription list box, choose the required subscription.
- In the Resource group list box, choose the required resource group.
- If you do not have one, click Create new, enter the name, and click OK.
- Click Next : Tags >. The Tags pane appears.
- In the Tags pane, type the name and value in the respective boxes, and then click Review + create.
- The Review + create pane appears.
- Once the validation is passed, click Create.
The new Network security group appears in the Network security group pane.

Associating NSG to Subnet
Security rules within network security groups filter network traffic based on IP address, port, and protocol. When a subnet is associated with a network security group, the security rules are enforced on resources deployed in that particular subnet. To associate NSG to a subnet in the Azure portal, follow the instructions:
To associate NSG to subnet
- Sign in to the Azure Portal.
- In the Search box, search for Network Security Group. The Network security group pane appears.
- Choose the required NSG to associate a subnet.
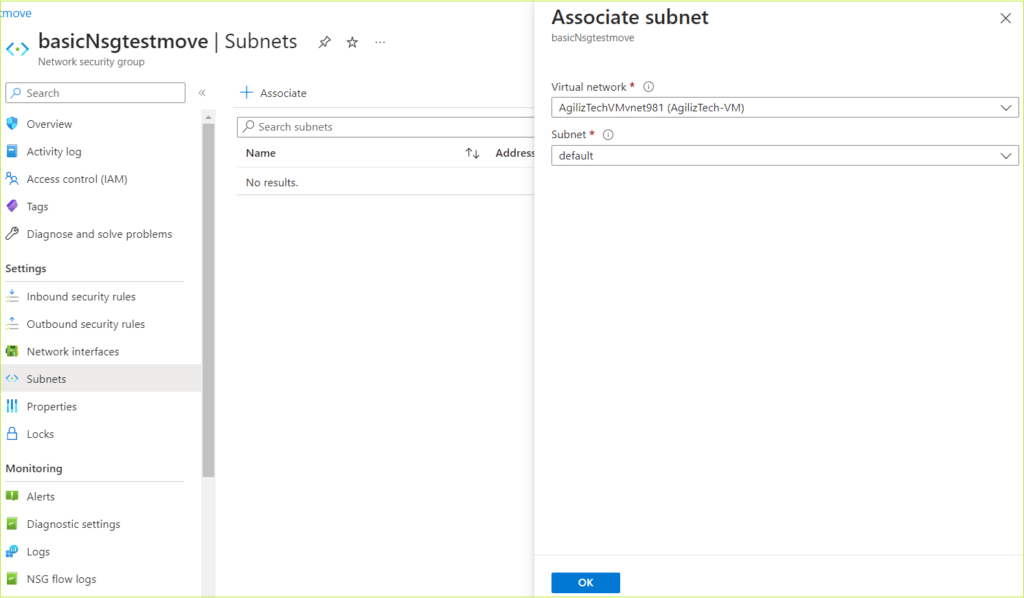
- In the left pane, under Settings, click Subnet. The Subnets pane appears.
- Click + Associate. The Associate pane appears.
- In the Virtual network and Subnet list box, choose the required virtual network and subnet respectively.
- Click OK.
The associated subnet appears in the Subnets pane.


